
Introduction to the Custom Image Template
The Custom Image Template on Tromero allows users to import and run their own Docker images directly from DockerHub. This flexibility enables developers to use a preconfigured environment that precisely meets their project requirements. By leveraging Docker, you can ensure consistency across different environments, making it easier to manage dependencies and configurations.
Custom Image on Tromero
Using your own Docker image on Tromero is a seamless process. Here’s how you can get started:
Step-by-Step Guide to Import and Run Your Docker Image
1. Initial Configuration
Tromero provides various types of images that you can use to develop in. However, if these images do not fit your needs, you have the option to bring your own image to our platform. Navigate to the OS Template section of our page and select the Custom Image button.
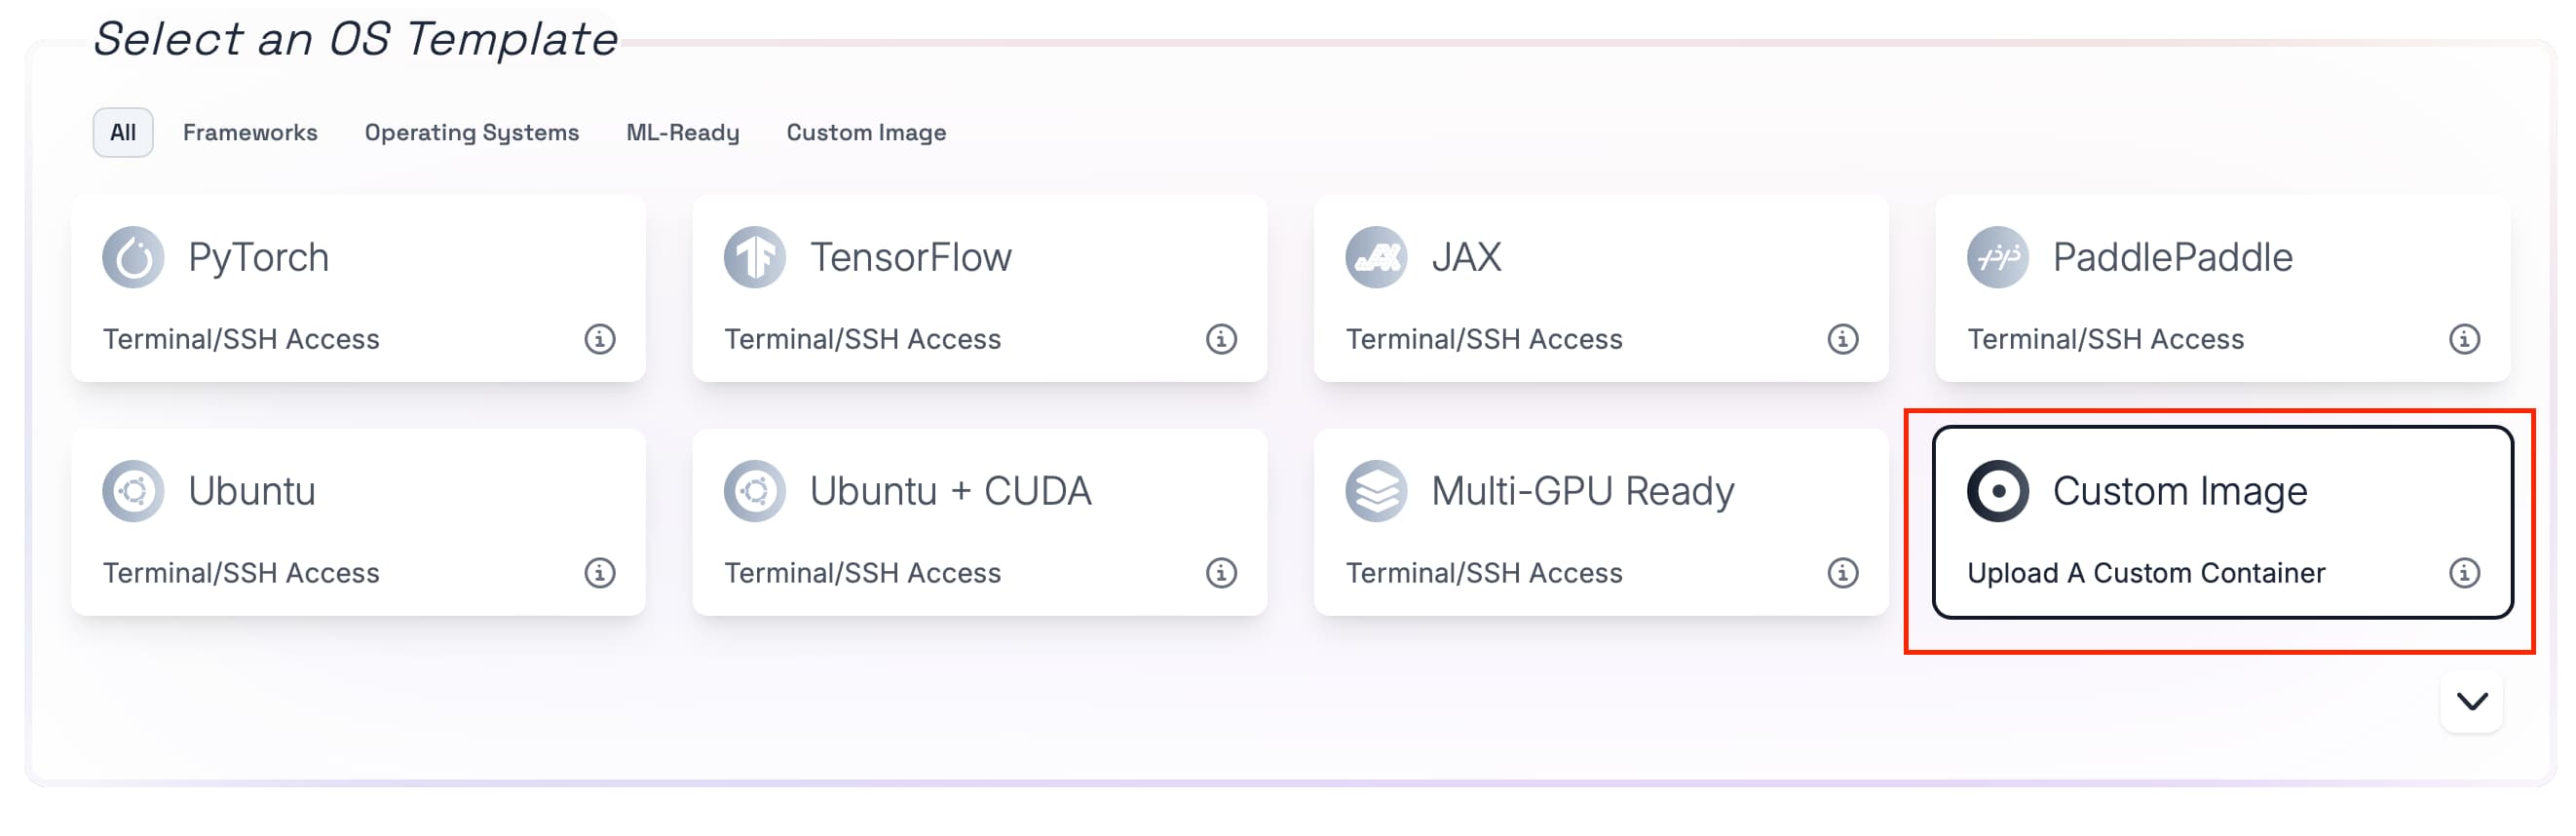
By choosing the Custom Image option, you will be presented with various settings.
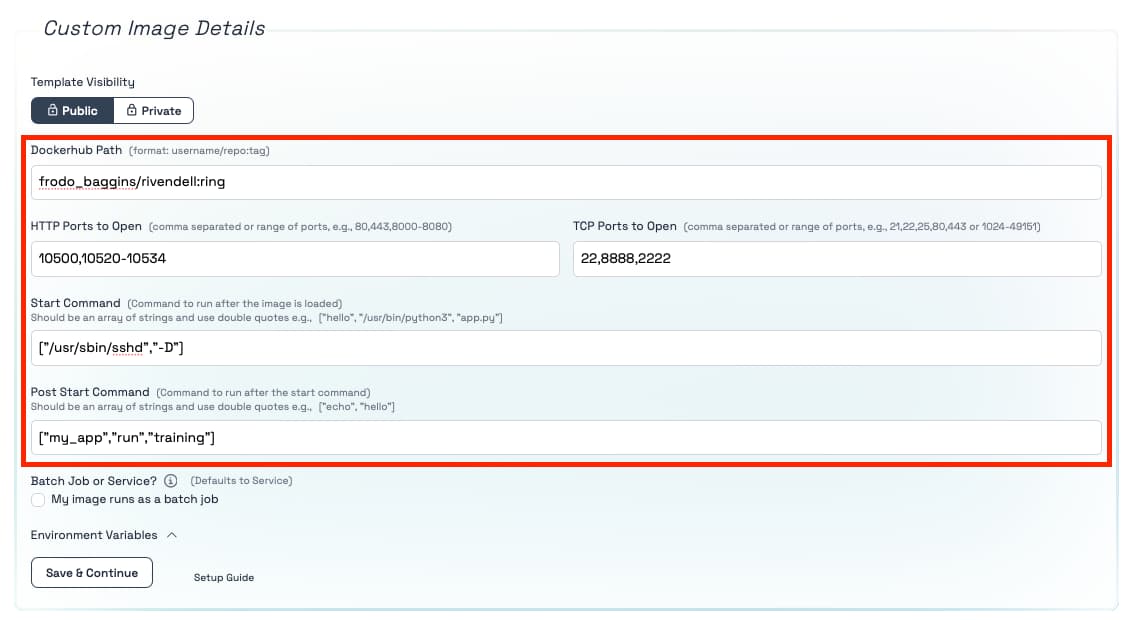
Here you can add the path to your Docker image and the ports (TCP or HTTP) that you want to open for the container.
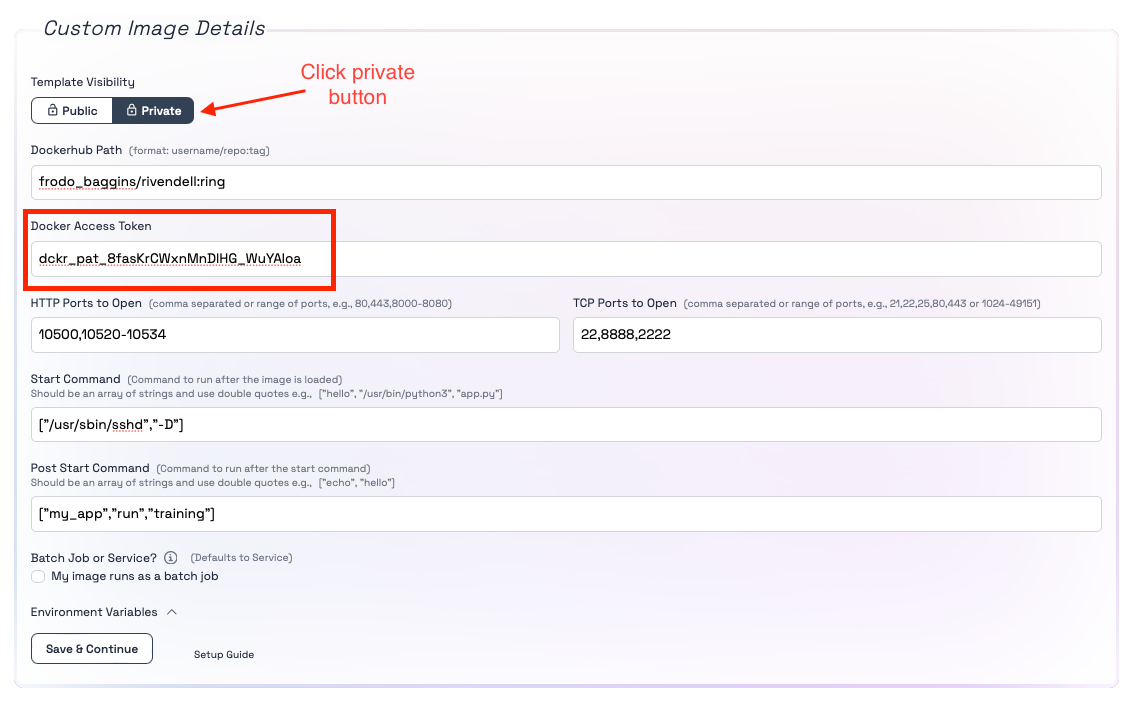
2. Accessing an Image in a Private Repository
To access an image in your private repository, click on the private button to open a field for entering your Docker access token. To create a new Access Token, use this link.
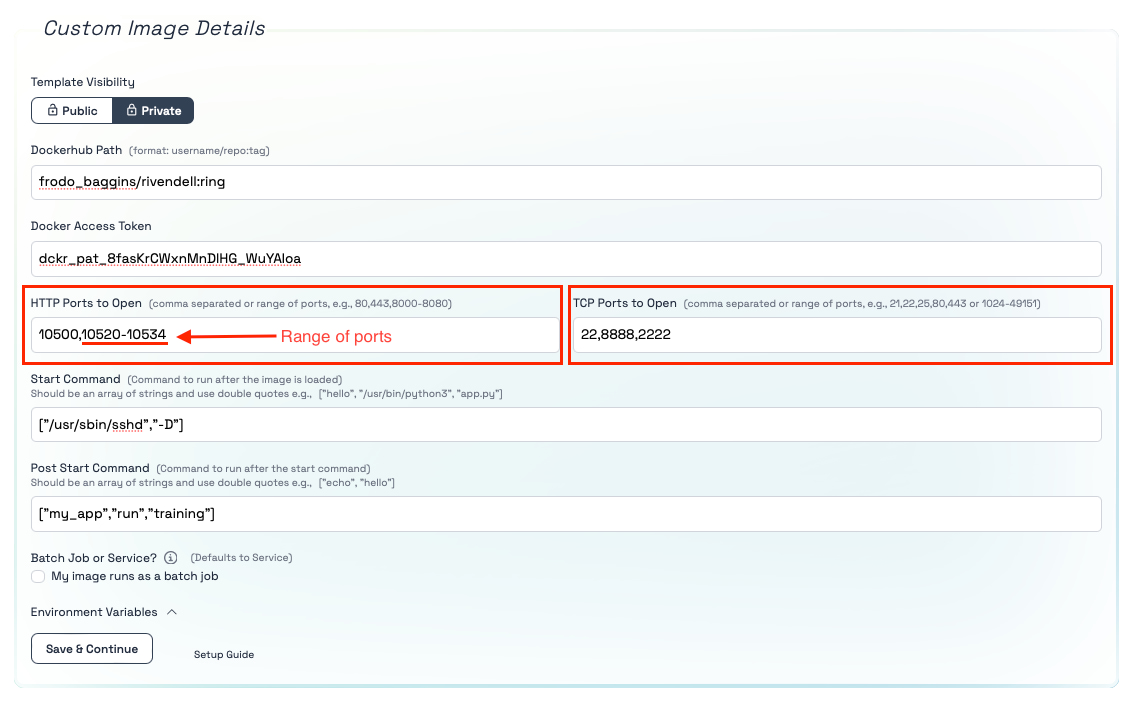
3. Selecting Ports for Your Container
To open ports for your container, enter your desired TCP or HTTP ports into their respective fields. To define a range of ports, use "-" between the two end-ports of the series (e.g., 10520-10534).
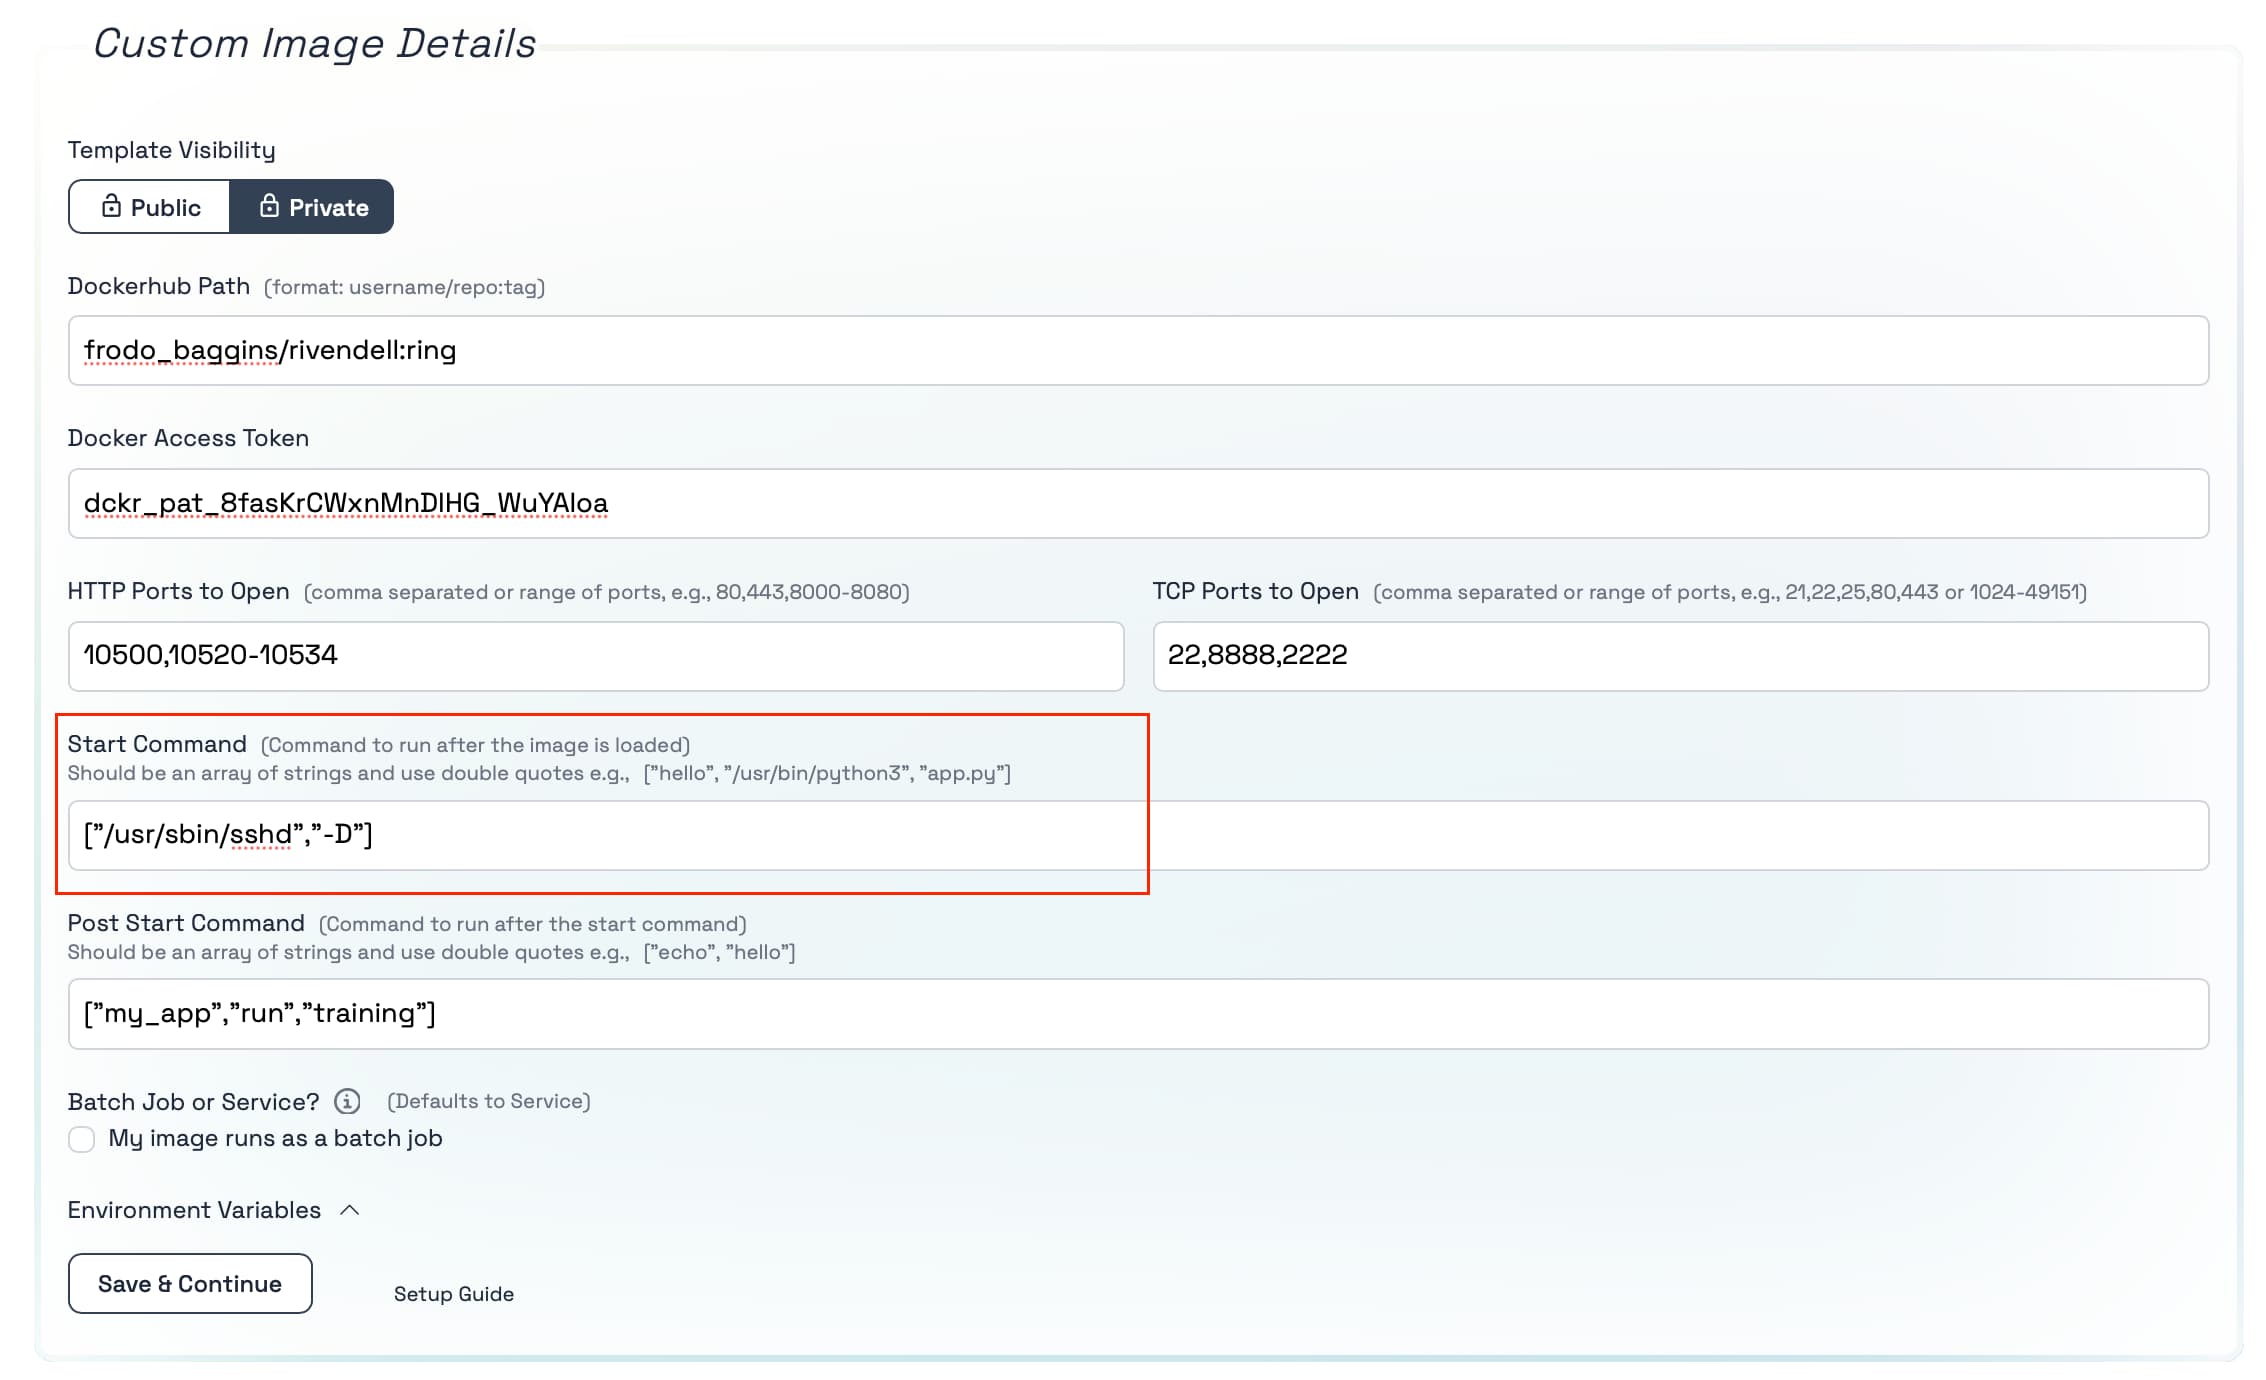
4. Defining Your Docker Start Command
It is popular with docker containers to define a start-command that starts your application. If you did not define one in your container or you would like to overwrite it, you can define your custom start-command in the Start Command field. Similarly to Docker containers, we require you to define your Docker start-command as an array of string separated by commas, e.g. ["/usr/sbin/sshd", "-D"]. Important: this start-command overwrites the one defined in your Docker file so make sure that is what you want to do and the command is correct before you use it.
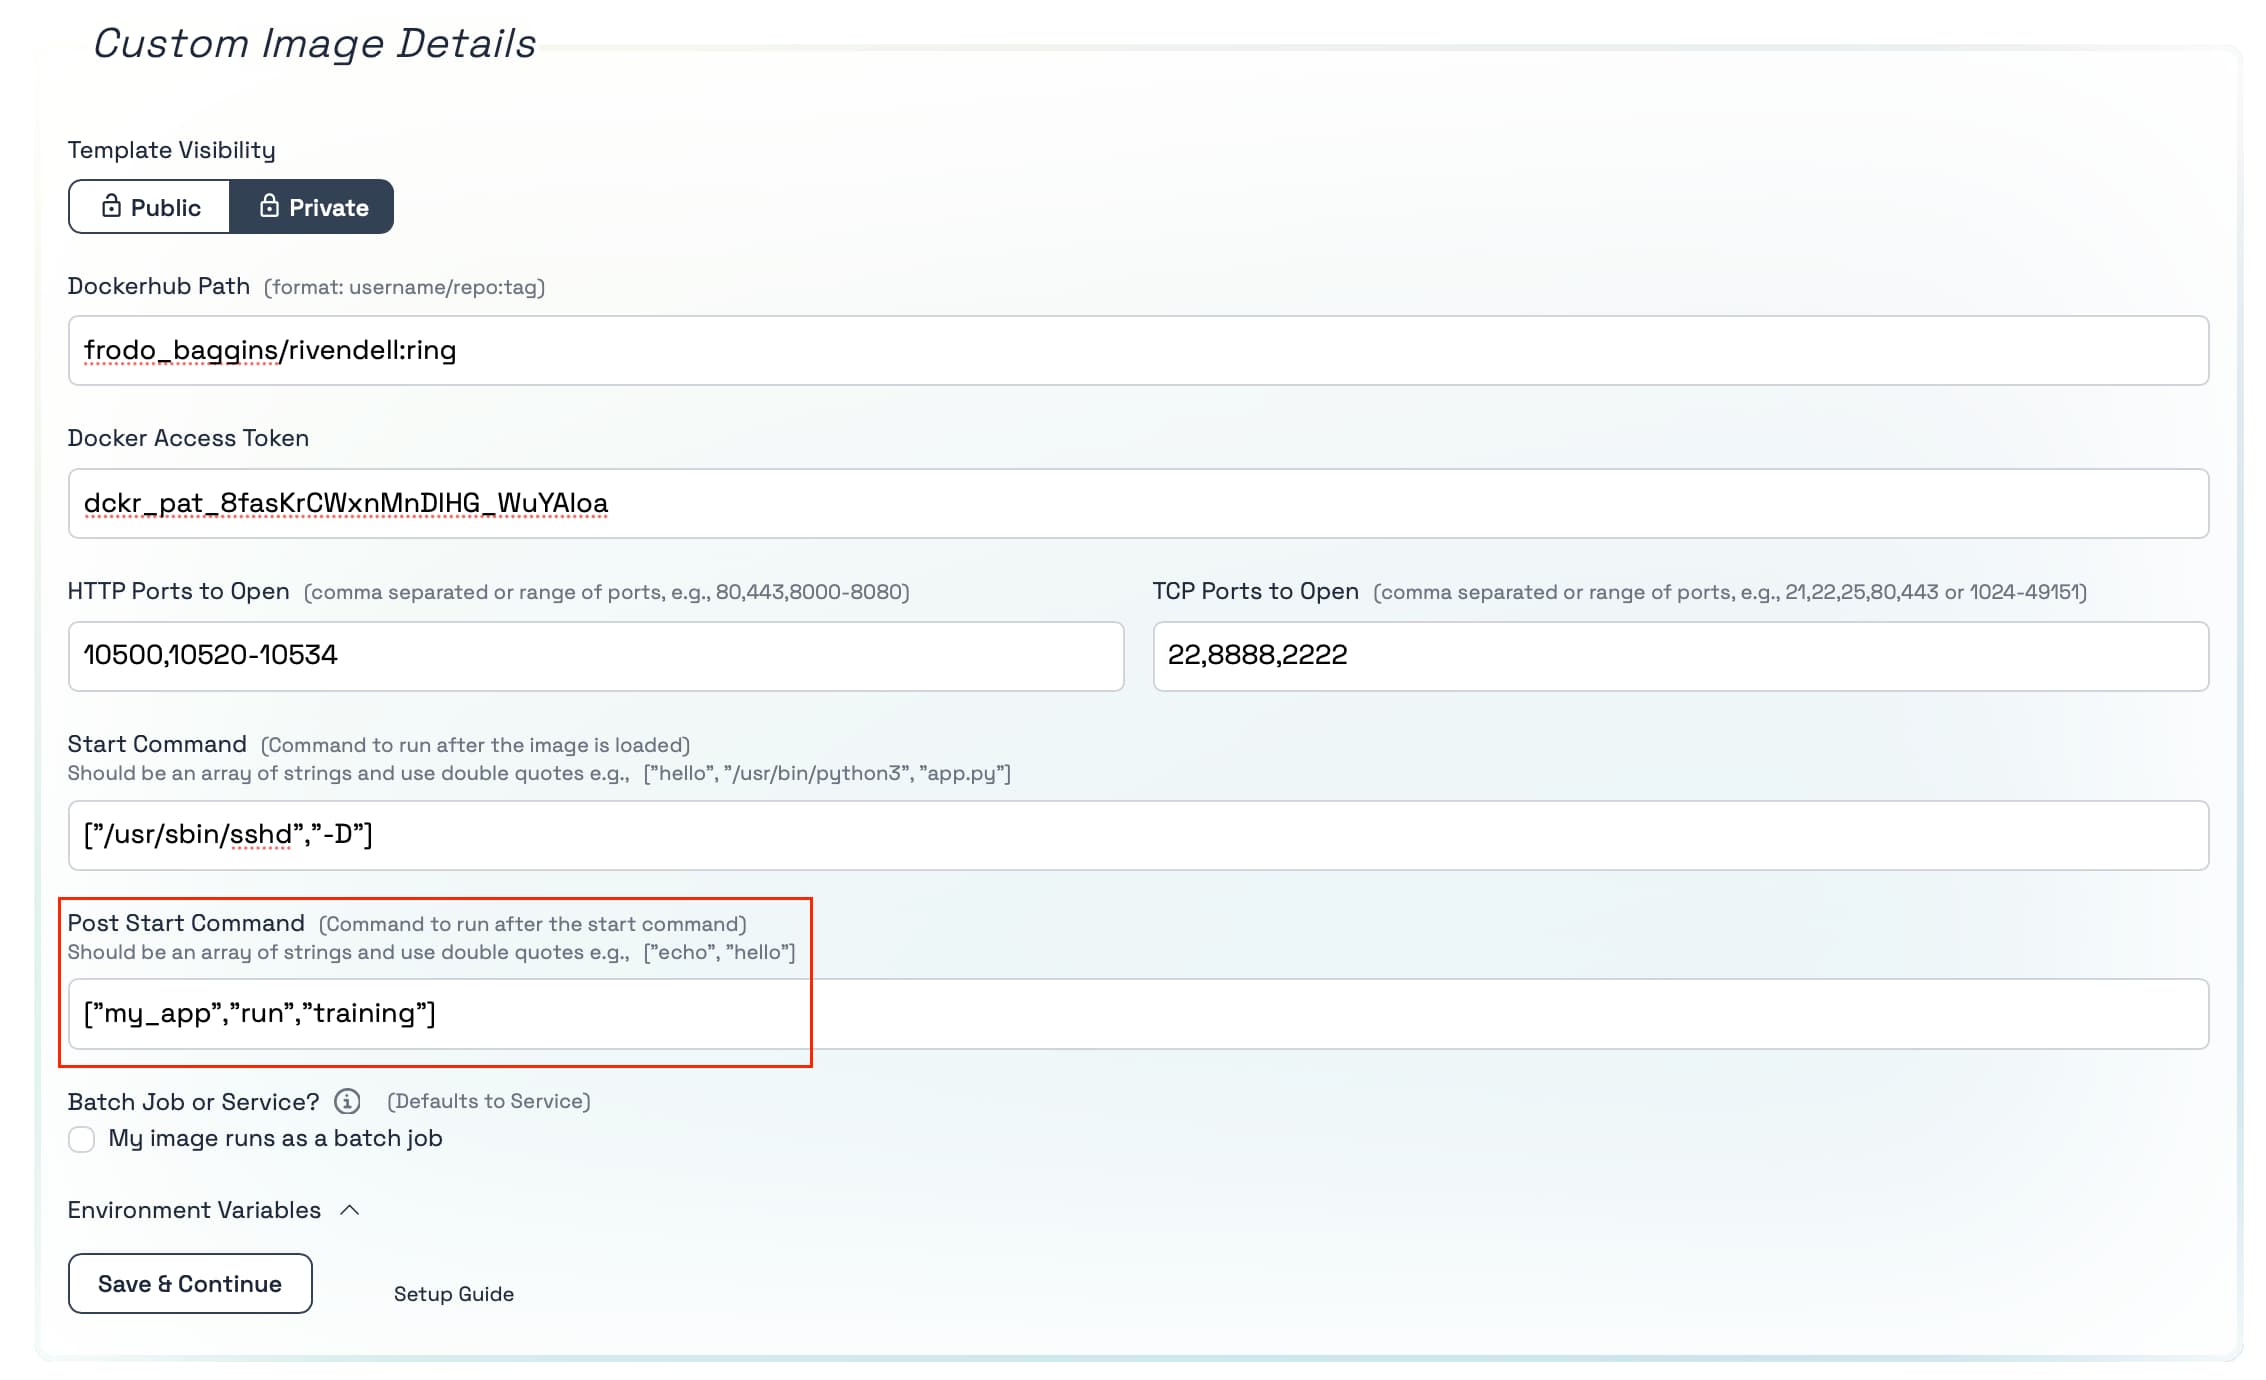
5. Adding Your Post Start Command
If you would like to execute other commands or setups after your Docker start command, for example you are using a public image which you do not know the Docker start command of and want to start a server after the container has started, then you can use the post-start command. This command is executed in the command line right after your container started and executed its Docker start-command. It is also defined as an array of strings separated by commas, e.g. ["python3", "server.py"].
6. SSH Access to Your Instance
To SSH into your instance, set up an SSH server in your Docker image on port 22 (or your specified port) with your SSH key(s) in the authorized keys folder.
FROM [INSERT YOUR BASE IMAGE HERE]

# Update the package repository and install openssh-server
RUN apt-get update && apt-get install -y openssh-server

# Create the directory for the SSH daemon to run
RUN mkdir /var/run/sshd

# Copy your public key from the build context to the image
# Replace /path/to/your/public_key with the actual path in your build context
COPY /path/to/your/public_key /tmp/id_rsa.pub

# Create SSH directory for the root user
RUN mkdir -p /root/.ssh && \
    cat /tmp/id_rsa.pub >> /root/.ssh/authorized_keys && \
    chmod 600 /root/.ssh/authorized_keys && \
    rm /tmp/id_rsa.pub

# Expose port 22 to the outside world
EXPOSE 22

# Start the SSH service
CMD ["/usr/sbin/sshd", "-D"]
Add port 22 (or your specified port) to the TCP ports if everything is set up correctly.
7. Adding Environment Variables
Click on the "Environment Variables" dropdown menu to define keys (variable names) and values as environment variables.

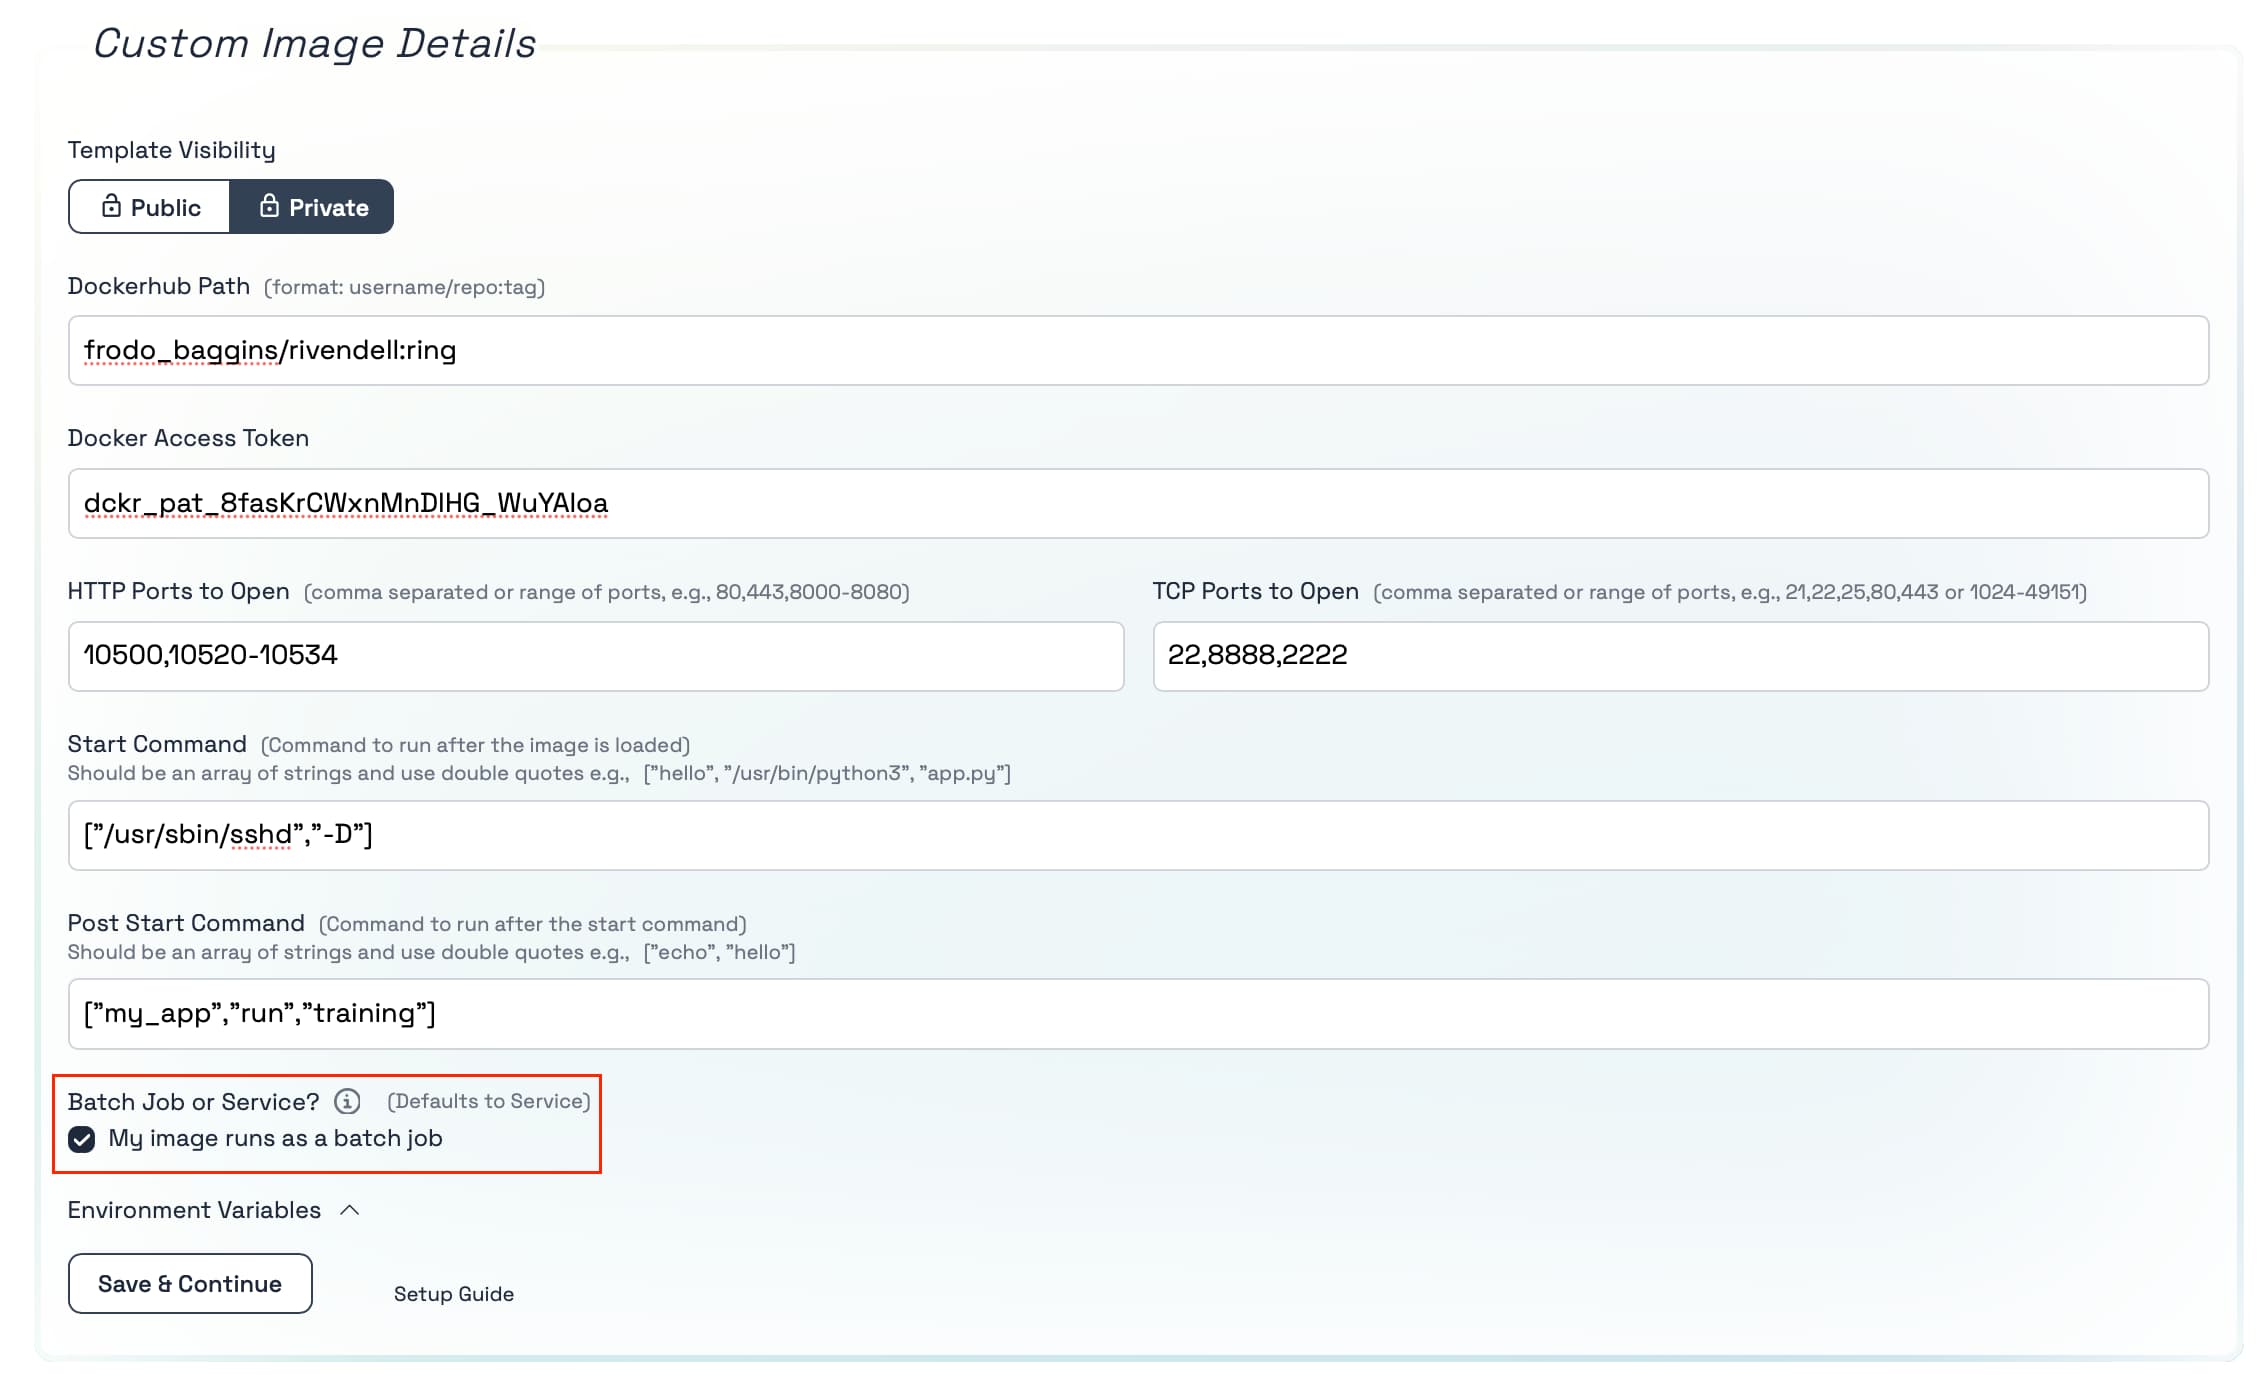
8. Running Your Container as a Batch Job
If your container is meant for executing a batch job rather than serving requests, select the "My image runs as a batch job" option. This will not create an associated service or port mapping for your container; it simply runs the container until it completes its tasks.
Once you are satisfied with your setup, click on "Continue" to select one of our many GPU options for your work.
Conclusion
The Custom Image Template on Tromero provides unparalleled flexibility for developers who need a tailored environment for their AI and data science projects. By allowing the import and execution of custom Docker images, you can ensure that your projects have the exact dependencies and configurations needed for success.
For a detailed guide on running Docker images on Tromero, please visit this article.
If you need further assistance, please contact support@tromero.ai and we would be happy to help!